
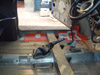
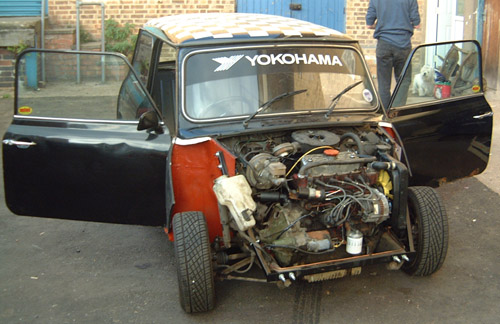
Now the Mini had arrived back from Southam Mini and Metro centre, with all rot removed and everything welded up firmly, it
was time to paint it all up before the rust set in again :-) As you can see from the photos below (click on the thumbnails
to enlarge) there had been a lot of welding and new panels, which Southam had given a good coating of what I presume was
red oxide primer (forgot to ask them what it was) over the welds to protect them, So it was just up to me to paint the new
panels and do some cosmetic touch ups.


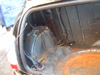
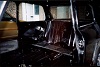
I decided to tackle the interior first, while the weather was good enough that I could have the car outside while I was painting, and during daylight. Rubbing down the entire interior took a fair bit of elbow grease, as well as a wire brush wheel on my power drill for those stubborn bits, followed off by degreasing with white spirit. To make things easier, as well as cheaper than buying a load of spray cans, I bought an airless spraygun for applying the Hammerite (a brilliant paint - ideal for Minis as recommended by Southam Mini and Metro centre). Despite following the instructions to the letter, including thinning down the paint to the right viscosity (as checked by the little plastic cup that came with the sprayer), the bloody thing played up big time. As much paint sprayed out of the various seams in the sprayer as came out of the nozzle, then the piece de resistance - it packed up totally. Despite this, I managed to get the interior pretty much coated, and was able to finish off the job with a couple of hammerite aerosols. At some point in the future I'll hire a proper compressor system and do the job properly, but as all the metal is well coated to prevent rust, that will have to wait until I've got the funds to do it. Suffice to say the sprayer went straight back to the DIY store for a full refund on the monday!


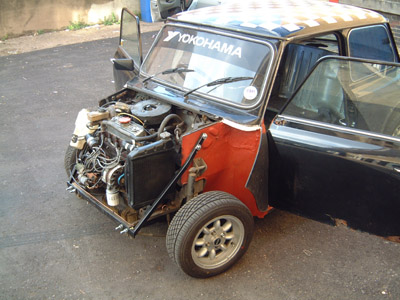
The next step was to sray up the outer panels that needed it - both A panels and both outer sills (all new and therefore only painted with the panel manufacturer's e-coat). More rubbing down and degreasing, followed by a 5 or 6 coats of Halfords Zinc Primer (aerosol), then leave to dry overnight. Next day, rub down again and apply 5 or 6 coats of Rover Black (aerosol), again from Halfords.

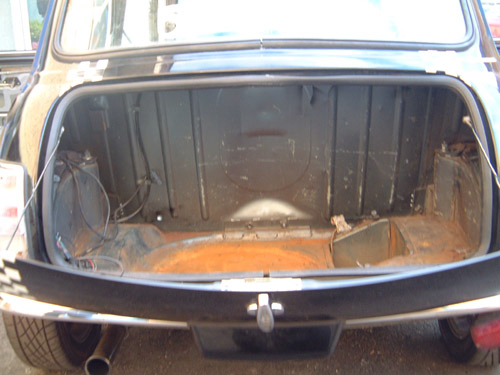
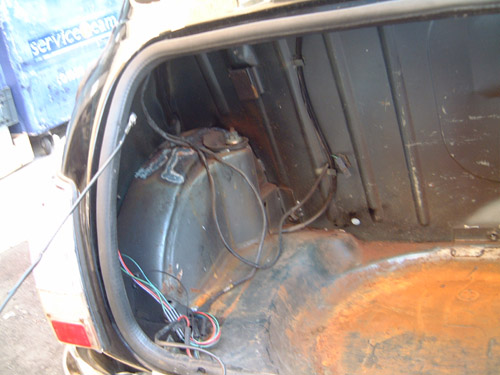
I decided to tackle the interior first, while the weather was good enough that I could have the car outside while I was painting, and during daylight. Rubbing down the entire interior took a fair bit of elbow grease, as well as a wire brush wheel on my power drill for those stubborn bits, followed off by degreasing with white spirit. To make things easier, as well as cheaper than buying a load of spray cans, I bought an airless spraygun for applying the Hammerite (a brilliant paint - ideal for Minis as recommended by Southam Mini and Metro centre). Despite following the instructions to the letter, including thinning down the paint to the right viscosity (as checked by the little plastic cup that came with the sprayer), the bloody thing played up big time. As much paint sprayed out of the various seams in the sprayer as came out of the nozzle, then the piece de resistance - it packed up totally. Despite this, I managed to get the interior pretty much coated, and was able to finish off the job with a couple of hammerite aerosols. At some point in the future I'll hire a proper compressor system and do the job properly, but as all the metal is well coated to prevent rust, that will have to wait until I've got the funds to do it. Suffice to say the sprayer went straight back to the DIY store for a full refund on the monday!


The next step was to sray up the outer panels that needed it - both A panels and both outer sills (all new and therefore only painted with the panel manufacturer's e-coat). More rubbing down and degreasing, followed by a 5 or 6 coats of Halfords Zinc Primer (aerosol), then leave to dry overnight. Next day, rub down again and apply 5 or 6 coats of Rover Black (aerosol), again from Halfords.