
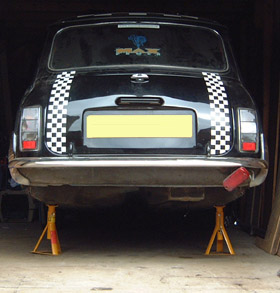
 The first Step to remove the rear subframe is to jack the back of the car up, remove the rear wheels and and
put the car securely on axle stands (shown right) - you really don't want it falling on your head while you're
working underneath...
The first Step to remove the rear subframe is to jack the back of the car up, remove the rear wheels and and
put the car securely on axle stands (shown right) - you really don't want it falling on your head while you're
working underneath...The next step was to blast a good amount of WD40 over all the bolts holding the rear subframe to the bodyshell, in an overly optimistic attempt to free up those bolts which were hopelessly rusted solid. Then place something under the rear subframe to support it once the bolts are removed (I used a sturdy wooden plank balanced on my trolley jack, as this had the advantage of being able to lower the subframe out easily once the bolts were removed, safety of supporting only with the trolley jack wasn't a problem as I wouldn't be under the car once the rear bolts had been removed). In the end I managed to unbolt just two of the bolts - the rest all had to be ground off with my trusty angle grinder... I started with the rear bolts for the subframe.
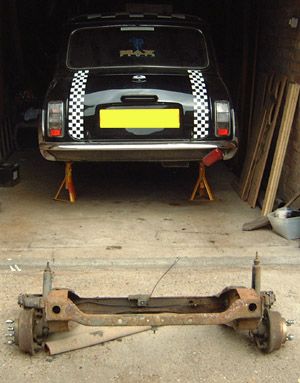
Once I'd removed the rear bolts it was time to move on to the front bolts, which had also siezed rock solid (the heads of the bolts rounded off almost immediately). Needeless to say the old angle grinder got another outing. Once the heads had been ground off the bolts, I was able to roll the subframe off them thanks to the wheels on the trolley jack, drop it down onto the floor and dump it outside (see picture below, click thumbnail to enlarge) until I was ready to take it to the tip (word of warning, it's a lot heavier than it looks, and bloody awkward to get into the back of a golf :-). I then removed the headless studs using a pair of waterpump pliers and and large dose of WD40, brute force and bad language (well actually 3 of them, the fourth wouldn't budge, so I left it in for the experts at Southam Mini and Metro Centre to deal with - I presume they have special 'Industrial Grade' bad language and some really big pliers :-)
Once all this was done, it was ready to go off to Southam Mini and Metro Centre, where they did all the welding, as well as put in the new 1275 MG Metro engine I'd sourced. It came back looking much better - all the rust gone, lots of nice new panels and steel plate welded in where whole panels were not needed.
