 The first Stage of the project was to remove everything that could possibly be removed from the car - seats,
carpet, sound deadening, dashboard, fuel tank, battery, then depending on whether We'll be refitting it or
replacing it, either taking it to the tip, or cleaning it up.
The first Stage of the project was to remove everything that could possibly be removed from the car - seats,
carpet, sound deadening, dashboard, fuel tank, battery, then depending on whether We'll be refitting it or
replacing it, either taking it to the tip, or cleaning it up.The first job we tackled was to remove the battery, a simple matter of unbolting the retaining bar and then disconnecting the battery leads. Unfortunately the positive lead had so much gunk on the screw we had to just cut the lead off. Not a big problem, but irritating as it means buying new clamps when I get a new battery.
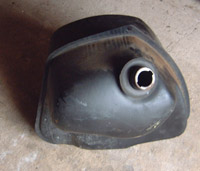
 The next job was removal of the fuel tank, a bit more complicated, but still very straightforward - the main
difficulty was draining it (the Mini had a full tank of Optimax when it died!) We don't have a mechanical
siphon or other type of pump, and as siphoning by mouth would be about as clever as playing chicken with a freight
train, we decided to jack the car up, support it on axle stands then simply cut the rubber fuel hose under the
car and collect the fuel in a suitable container. We then disposed of the fuel by sieving it for crud then
pouring it into the fuel tank of my trusty Golf. Once the tank was drained (done in a well ventilated area away
from any live electrics or other sources of ignition) removal was simply a matter of unbolting the metal strap
that holds it in place, disconnecting the fuel gauge wires on the bottom right of the tank and pulling it clear
of the car (making sure the fuel cap is removed as otherwise you can't pull the filler neck through the rear
wing)
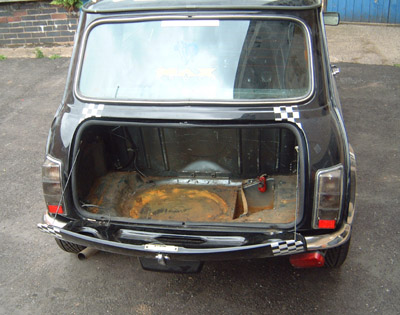
The next job was removal of the fuel tank, a bit more complicated, but still very straightforward - the main
difficulty was draining it (the Mini had a full tank of Optimax when it died!) We don't have a mechanical
siphon or other type of pump, and as siphoning by mouth would be about as clever as playing chicken with a freight
train, we decided to jack the car up, support it on axle stands then simply cut the rubber fuel hose under the
car and collect the fuel in a suitable container. We then disposed of the fuel by sieving it for crud then
pouring it into the fuel tank of my trusty Golf. Once the tank was drained (done in a well ventilated area away
from any live electrics or other sources of ignition) removal was simply a matter of unbolting the metal strap
that holds it in place, disconnecting the fuel gauge wires on the bottom right of the tank and pulling it clear
of the car (making sure the fuel cap is removed as otherwise you can't pull the filler neck through the rear
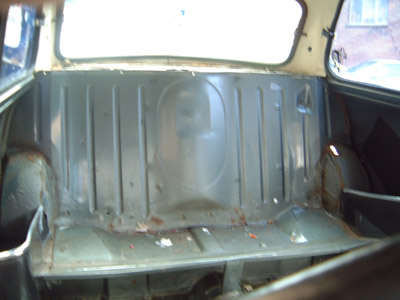
wing)This left a nice empty boot, with all the rust visible! (picture left)
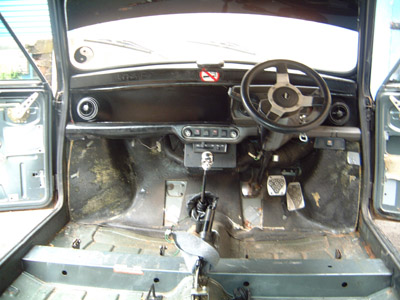
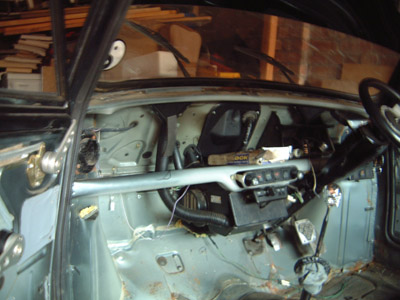
The next stage was to remove all of the interior, basically unbolting the seat subframes and rear seat, then pulling up the carpets, removing the gear lever gaiter and doorcards. The headlining (which was already knackered) was just pulled out (a neat tip for this is to remove the bit of trim that tightens the rubber window seal, and just ease the headlining under the window seal with a blunt screwdriver, which enables it to all pull out easily without removing the front and rear windscreens). We removed all of the dash, gauges and other front fittings, then all the sound deadening, basically removing everything out from the interior except the heater! (left in to save having to drain the engine coolant). Click on the thumbnails below for larger pictures of the stripped out interior. All that was left to do before the Mini went off to Southam Mini and Metro Centre was to remove the front end, and then the rear subframe.